
Remove a Photo Background for a Pinterest Pin
Turn a product or portrait into a reusable cutout, then build a readable pin around it. Check the final composition on a phone before publishing.
In this guide
Choose the photo before building the pin
Pick a photograph with one clear subject and enough detail for the final layout. A busy crop can leave you with a cutout that has nowhere to place the title. Keep the original and use a duplicate for editing.
For a product, preserve the actual color, label and shape. If the subject is too small or blurry, find a better original before adding a headline.
Make a reusable transparent cutout
Upload the image to BGClear. After processing, choose Background, None and download PNG. Open the exact download in the transparency checker if it has an unexpected white box.
Inspect pale product edges and loose hair on a dark background as well as white. A missed corner is easier to fix before the image is placed in multiple designs.
Build the layout in your design tool
Create a canvas for the pin format you plan to publish, following the current dimensions shown in Pinterest’s publishing interface. Place the cutout and reserve a clear area for the headline. BGClear prepares the image; the final pin layout is a separate design step.
Use one main message. Place the subject where it supports the words instead of covering them. Choose colors with enough contrast that the product and text stay distinct.
Run a phone-size check
Reduce the preview to the width of a phone screen. Read the headline without zooming. Check whether the subject is still recognizable and whether the edges remain clean on your chosen background.
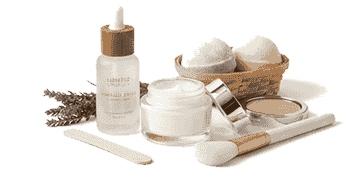
The example below uses BGClear’s product cutout on a simple pin-like layout. It is a teaching composition, not a Pinterest performance test. Use the same inspection steps on your own finished design.
Export and verify the destination
Save the completed pin in a format accepted by the publisher and preview the actual file. The final pin may intentionally have a solid background even though the reusable product cutout was transparent. Keep both versions.
Confirm that the destination link matches the image and promise in the pin. A product pin should lead to the relevant product or collection; a tutorial pin should open the promised guide.
Make a small set of variants
Change one useful element at a time, such as the headline or product placement. Keep source filenames and finished designs organized so you can reproduce a version later.
For a seller preparing multiple product photos, the white-background workflow can help create consistent source assets. Use results from your own Pinterest account to decide which layouts to keep.
A quieter
morning ritual
 Simple ideas for your space
Frequently asked questions
Should the finished pin have a transparent background?
Usually you create a transparent cutout as a design ingredient, then place it on a deliberate background in the finished pin. Follow the publisher’s accepted output formats.
Can I do the background removal on my phone?
Yes, use a supported mobile browser to select the image, review the cutout and download. Check the final pin at phone size as well.
Does background removal guarantee more clicks?
No. Image clarity helps communicate the idea, but audience, content, placement and the destination also affect performance.